Views save your screen configuration such as the filters, columns, sorting, grouping and totaling you have set up. You can create multiple views for a screen to quickly arrange the information on the screen in different ways. You can also use views as dashboard gadgets.
In most screens, there is a Views button on the top left of the screen. The Views drop-down is divided into three sections: your views, role or system views and view actions.
This article includes the following:
- Create Views
- Update Views
- Copy Views
- Send Views to Others
- Manage Views
- Delete Views
- Default Views
- USI Defined Views
- System Views
- View Reporting
- View Security
Create Views
Views save the filters and column settings (sorting, grouping, etc.) for a screen. You can create multiple views for a screen to quickly show your data in different ways. To create a view:
- Navigate to the screen you want to set up for the view.
- Configure the data in the screen as desired.
- Click the View button.
- Select Save As New View. The Save As New View screen opens.
- Enter the necessary information:
- Name - Name of the view that appears in the View menu.
- Display this View on - Select the screen(s) for the view:
- The Main Subject Page - The view is available for the main screen related to the view. For example, the view is available from the Events screen but not from the Events tab.
- All Subject Pages - The view is available for all screens related to the view. For example, the view is available from the Events screen and from the Events tab.
- Only the following Subject Pages - Select the screens for the view.
- Access Type - Select who can see and use the view:
- Only One User - Only you can see and use the view.
- Everyone - All users can see and use the view. This is called a System View.
- Users and Roles - Only users assigned to the selected role(s) in the Role drop-down can see and use the view.
- Performance Tuning - Checking any of the check boxes in this section may increase the load time for a screen.
- Display All Rows - If checked, displays all rows that meet the filter criteria. If unchecked, the first 200 rows meeting the filter criteria display by default. See Fine Tuning Performance & Load Time in Grids, Sections and Tabs for information on changing the default number of displayed rows.
- Automatically Load Results – If checked, the screen loads all results that meet the filter criteria when the screen opens. If unchecked, you must click the Search button to show the results.
- Click OK.
Update Views
You can update a view to include different filters or screen settings.
- Navigate to the screen with the view you want to update.
- Click the View button.
- Select the view to update. The screen refreshes with the view.
- Click the View button.
- Select Save View. The Save View screen opens.
- Update the necessary information.
- Click OK.
Copy Views
You can copy a view to create a duplicate view that you can change or alter. You can also copy an existing view to another related screen.
- Navigate to the screen with the view to copy.
- Click the View button.
- Select the view to copy. The screen refreshes with the view.
- Click the View button.
- Select Copy View. The Copy View screen opens.
- Enter the name of the new view into the Name field.
- Select the screen for the copied view from the Subject drop-down.
- Click OK.
Send Views to Others
You can share your views with other users. You can send views you create for yourself or views you can access as part of a role. You cannot send views available to everyone (system views) since all users already have access to them.
- Navigate to the screen with the view(s) to send.
- Click the View button.
- Select Send Views. The Send Views screen opens.
- Select the user(s) to receive the view from the Users drop-down.
- Select the view(s) to send from the Views drop-down.
- Click OK. The user receiving the view can open the View drop-down to see the newly sent view.
Manage Views
You can change the view name, access and performance tuning options using Manage Views.
- Navigate to the screen with the view(s) to update.
- Click the View button.
- Select Manage Views. The Manage Views screen opens.
- Select the view to update.
- Right-click and select Edit. The Edit View screen opens.
- Update the necessary information.
- Click OK.
Delete Views
You can delete views from Manage Views. Once you delete a view, you cannot recover it. To delete a view:
- Navigate to the screen with the view(s) to update.
- Click the View button.
- Select Manage Views. The Manage Views screen opens.
- Select the view to update.
- Right-click and select Edit. The Edit View screen opens.
- Select the view to delete.
- Right-click and select Mark for Delete.
- Click Save.
Default Views
- Navigate to the screen with the view to set as the default view.
- Click the View button.
- Select Set Default View. The Set Default View screen opens.
- Enter the following information:
- Theme Default View - Select the theme for the default view. Users assigned to the selected theme have the view set as their default view.
- My View - Default view for the user. The default view changes if the user changes the view on the screen.
- Click OK.
USI Defined Views
Screens in Momentus Enterprise come with some pre-configured views called USI Defined Views. You cannot change or delete a USI Defined View but you can hide them if you do not want them available on a screen. You must have an Administrator Access Level (configured on the Edit User screen) and assigned to the EBMSADMIN role to hide USI Defined Views.
Hiding a USI Defined View hides the view for all themes. If you hide a view that is set as a default view for a screen, your users may have problems opening the screen. Make sure you set another system view as the default view before hiding any USI Defined Views.
To hide a USI Defined View:
- Navigate to the screen with the USI Defined View to hide.
- Click the View button.
- Select Manage Views. The Manage Views screen opens.
- Select the USI Defined View to hide.
- Right-click and select Edit. The Edit View screen opens.
- Check the Hide check box.
- Click OK.
System Views
System views are views available to all Momentus Enterprise users. These are usually created maintained by your system administrator. To create a system view:
- Navigate to the screen you want to set up for the view.
- Configure the data in the screen as desired.
- Click the View button.
- Select Save As New View. The Save As New View screen opens.
- Enter the necessary information:
- Name - Name of the view that appears in the View menu.
- Display this View on - Select the screen(s) for the view:
- The Main Subject Page - The view is available for the main screen related to the view. For example, the view is available from the Events screen but not from the Events tab.
- All Subject Pages - The view is available for all screens related to the view. For example, the view is available from the Events screen and from the Events tab.
- Only the following Subject Pages - Select the screens for the view.
- Access Type - Select Everyone. This allows all users to see and use the view.
- Performance Tuning - Checking any of the check boxes in this section may increase the load time for a screen.
- Display All Rows - If checked, displays all rows that meet the filter criteria. If unchecked, the first 200 rows meeting the filter criteria display by default. See Fine Tuning Performance & Load Time in Grids, Sections and Tabs for information on changing the default number of displayed rows.
- Automatically Load Results – If checked, the screen loads all results that meet the filter criteria when the screen opens. If unchecked, you must click the Search button to show the results.
- Click OK.
View Reporting
If you are an administrator, you can use the Views screen from the Main Menu to see all the views in Momentus Enterprise. You can edit and delete all views including individual user views, role views and system views. You can also use this screen to view the performance tuning settings on your views to ensure your views are not causing a system performance problem.
View Security
Users can add, update and delete their own views. Adding, editing and deleting system views is controlled by the Allow Add/Edit/Delete System Views and Favorites access privilege. Roles and/or users assigned to this privilege can add, edit and delete system views. If no roles or users are assigned to this privilege, it is considered inactive and all users can add, edit or delete system views.
Comments
9 comments
Hi
I have created a view but cant add this on the dashboard due to 458 fixed assets not being able to choose as a subject, is there a way of showing this view any other way on the dashboard.
Thanks
Kris
0 upvotes
Kris - as of the current version (20.9), views from Fixed Assets are not available to add to a dashboard. It's being considered for the version due for release this summer or late 2017, but if you'd like to push to have this sooner, I'd recommend entering an enhancement on this site. Thanks.
Mark F
0 upvotes
Thanks Mark
0 upvotes
OPTION TO QUICKLY SWITCH TO EXACT DATE RANGE
In v19 in the Events window we had the option to have a predefined filter with the date range : all Events with start day yesterday and after.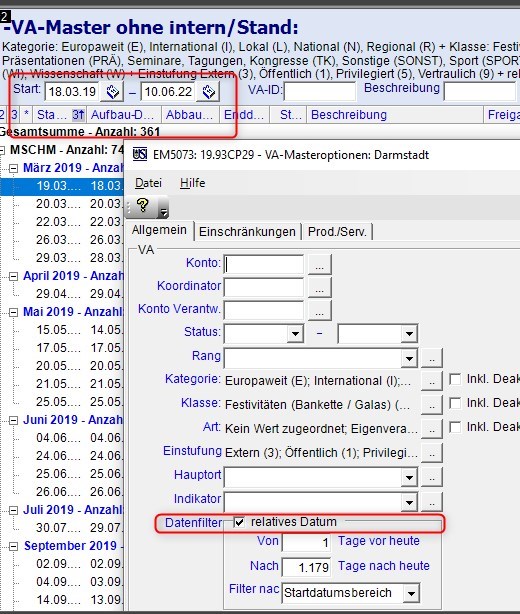
However, when needed I could quickly overwrite the date fields to the wanted date filters.
In v20. I can use the relative date field OR the exact.data field
Currently. I only see two options. :
We could work a lot more efficient if we had the same option as in v19. Can you pls advise if this will be developped?
Korinna
1 upvotes
Hi Korinna - I want to make sure I am understanding your question correctly. You are saying that in v19, using the relative date range mode and the exact date range mode were one in the same - you could easily move from relative to exact by typing in dates. However in v20, that requires pulling the settings next to the date field and switching from relative to exact. Is that correct? Thanks.
Mark F
0 upvotes
Hi Mark,
that is correct.
Korinna
0 upvotes
Hi Korinna,
It looks like that functionality isn't available in v20. If you would like to see it implemented in an upcoming release, you can submit an enhancement request through the Product Idea Forum.
Thank you!
Ryan
0 upvotes
I think what would be beneficial is for the dates to always be visible. Currently, the date values are replaced with the words "Last 7 Days" etc. It would be great if the actual date values are always present (perhaps greyed out) with the words trailing, until such time as you might want to override them, in which case the words might be removed.
This would serve two purposes. 1, you can clearly see the actual dates being applied and 2, you can quickly override as necessary.
2 upvotes
With v30.98E, it looks like users need a Professional License to be able to edit Views. Express Licenses cannot do it at all.
1 upvotes
Please sign in to leave a comment.